Appearance
Office 365 Settings
This document describes how to setup the Situate email endpoint security for incoming email. The Situate email endpoint must use Microsoft's XOAuth2 protocol. To do this, you must setup Situate as an application in the Entra admin center.
Step 1: Create an application

Find the "App Registrations" menu item
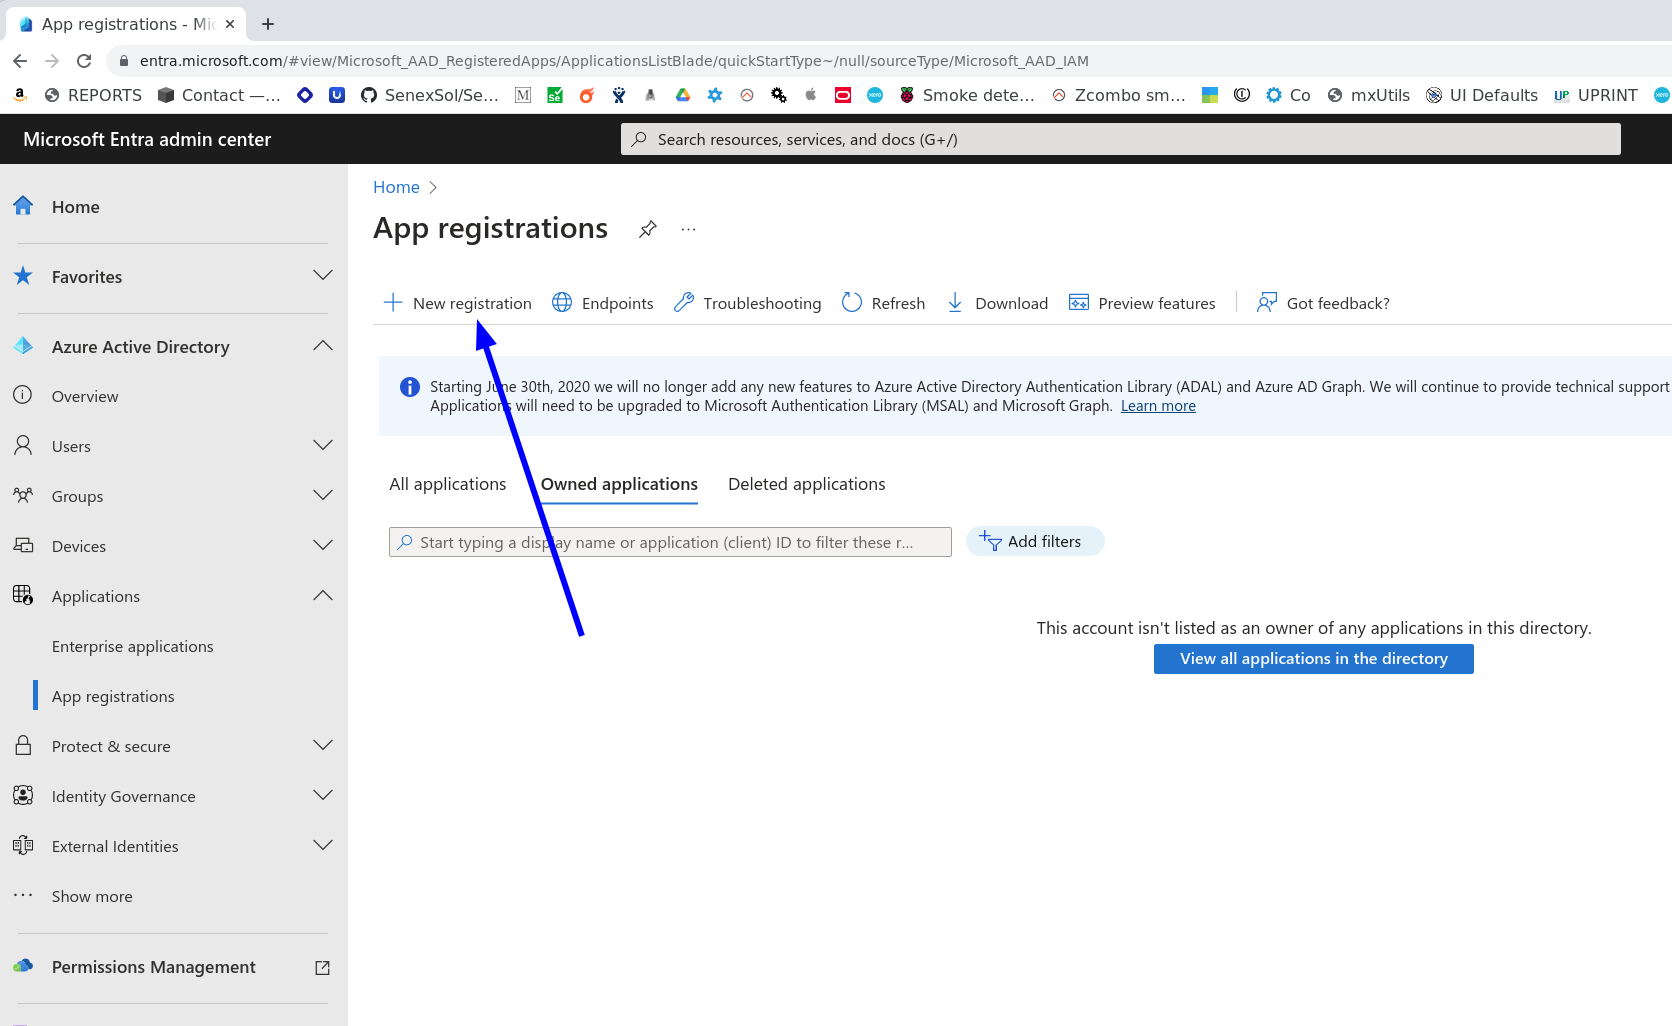
Select "New registration"
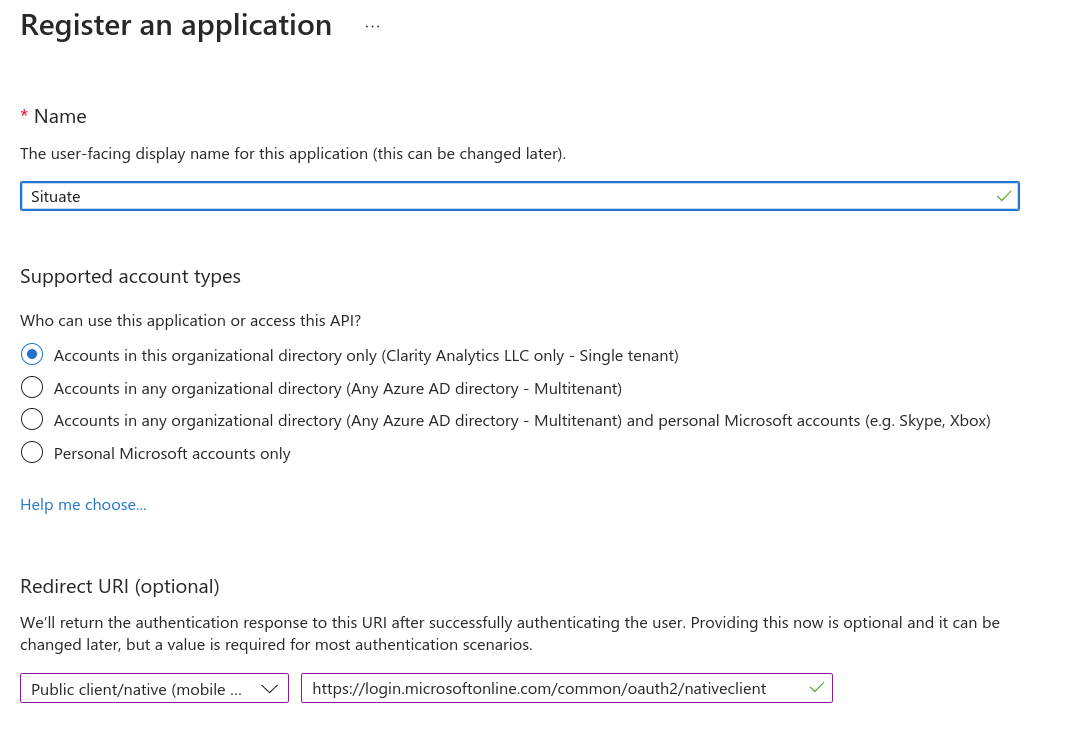
Pick a suitable name for your application such as "Situate". Make sure you select "Accounts in this organizational directory only", and do not select a Redirect URI.
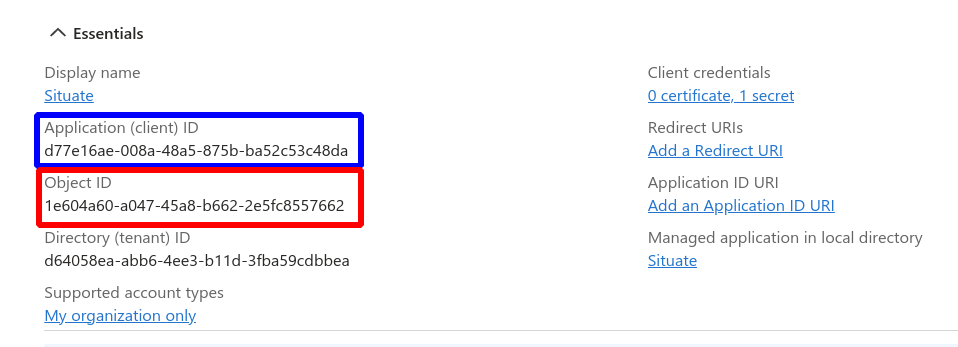
Once you have created your app, an Application ID and Object ID will be displayed. Save these values as they will be used in future steps.
Step 2: Adding API Permission
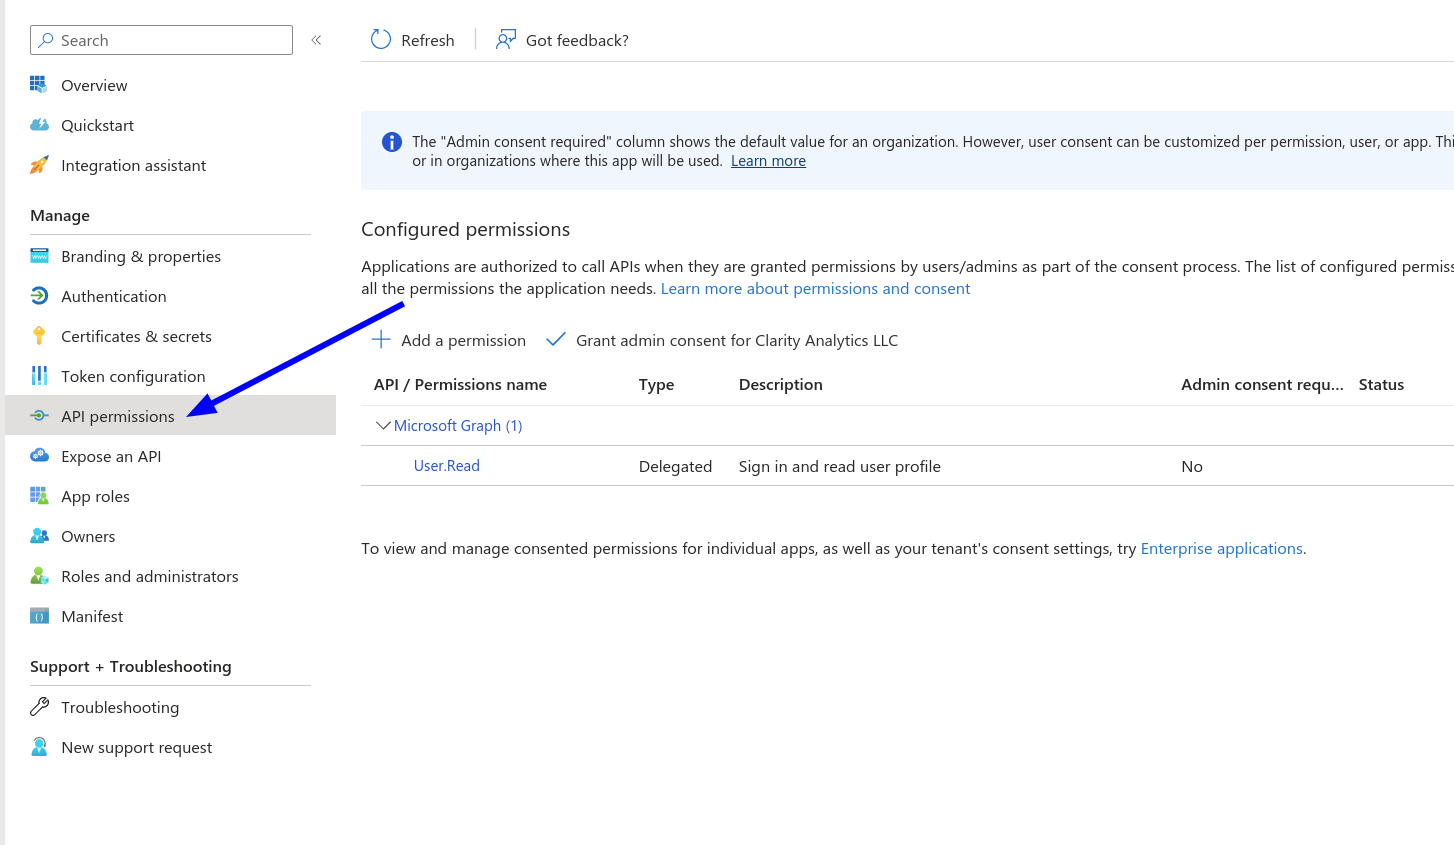
Select "API permissions"
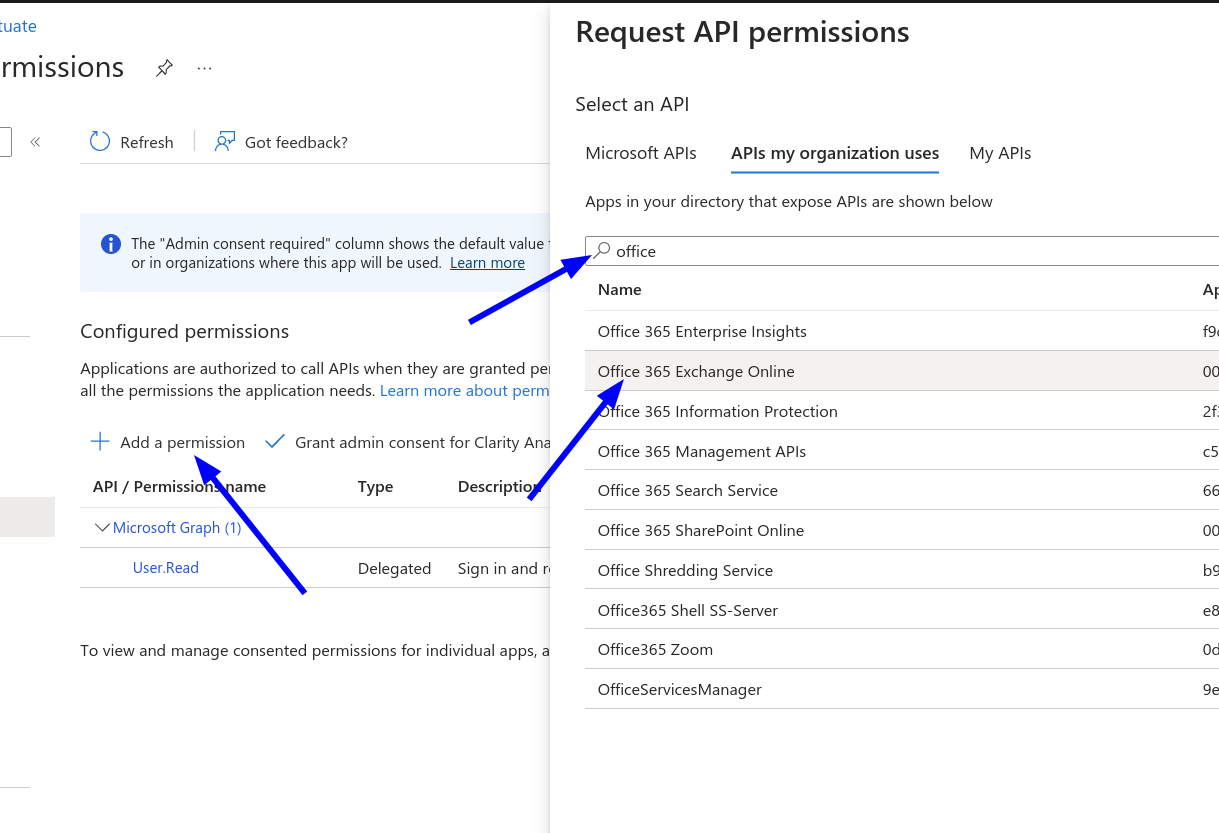
Select "Add a permission", Select "APIs my organization uses", then in the search box, enter "office". Finally, select "Office 365 Exchange Online".
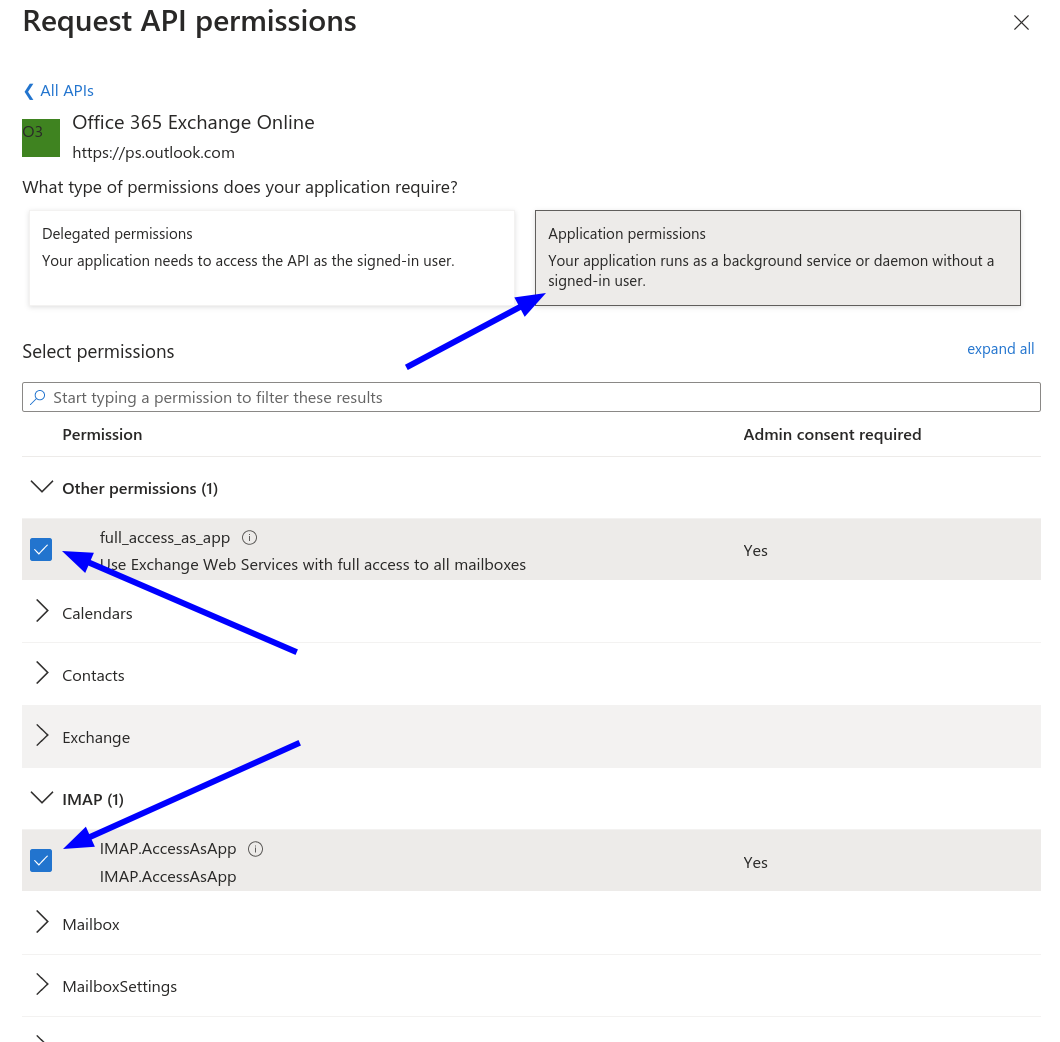
Select "Application permissions", then check the box "full_access_as_app" and also IMAP.AccessAsApp" and save those changes.
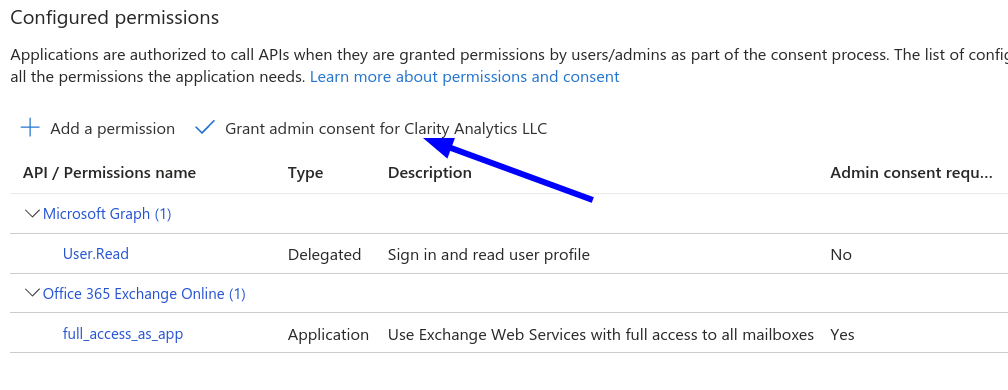
You must now grant admin consent for the changes you have made. This is done by pressing the "Grant admin consent ..." button.
Step 3: Adding a Client Secret
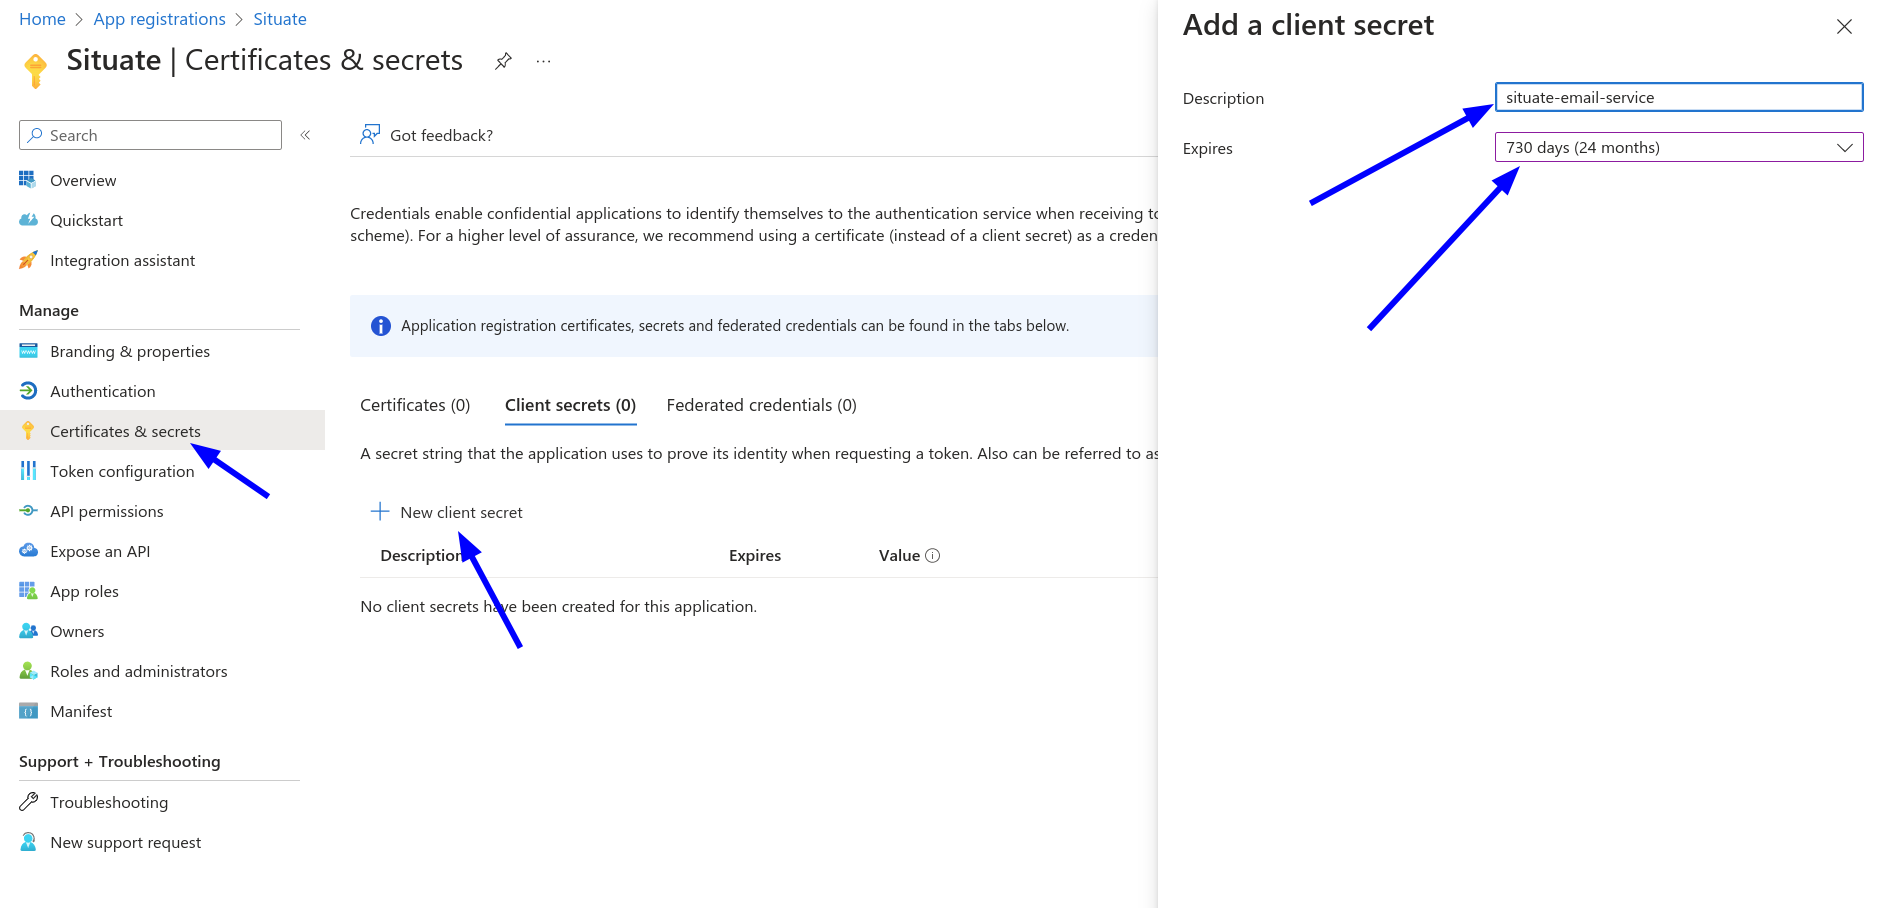
Select "Certificates and secrets". Then, select "New client secret".
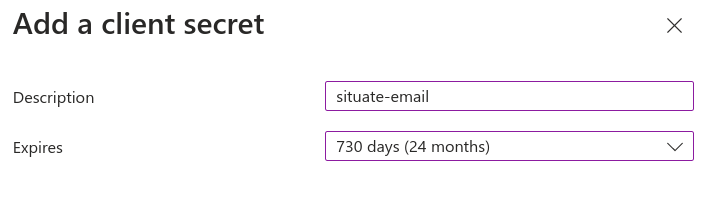
Select enter an appropriate description and set the "Expires" to 24 months.
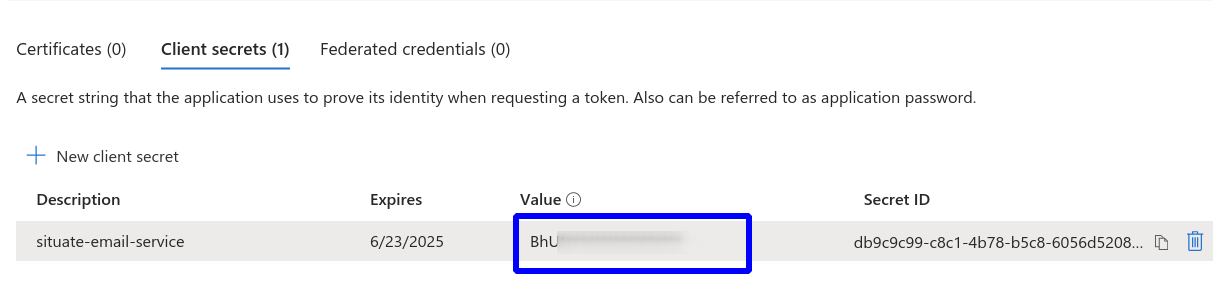
Once created, your client secret will be displayed. Copy the value and save it. It will be needed in the next steps.
IMPORTANT: You must save the value of the client secret now. It will not be visible once you leave this page.
Step 4: Updating the Manifest
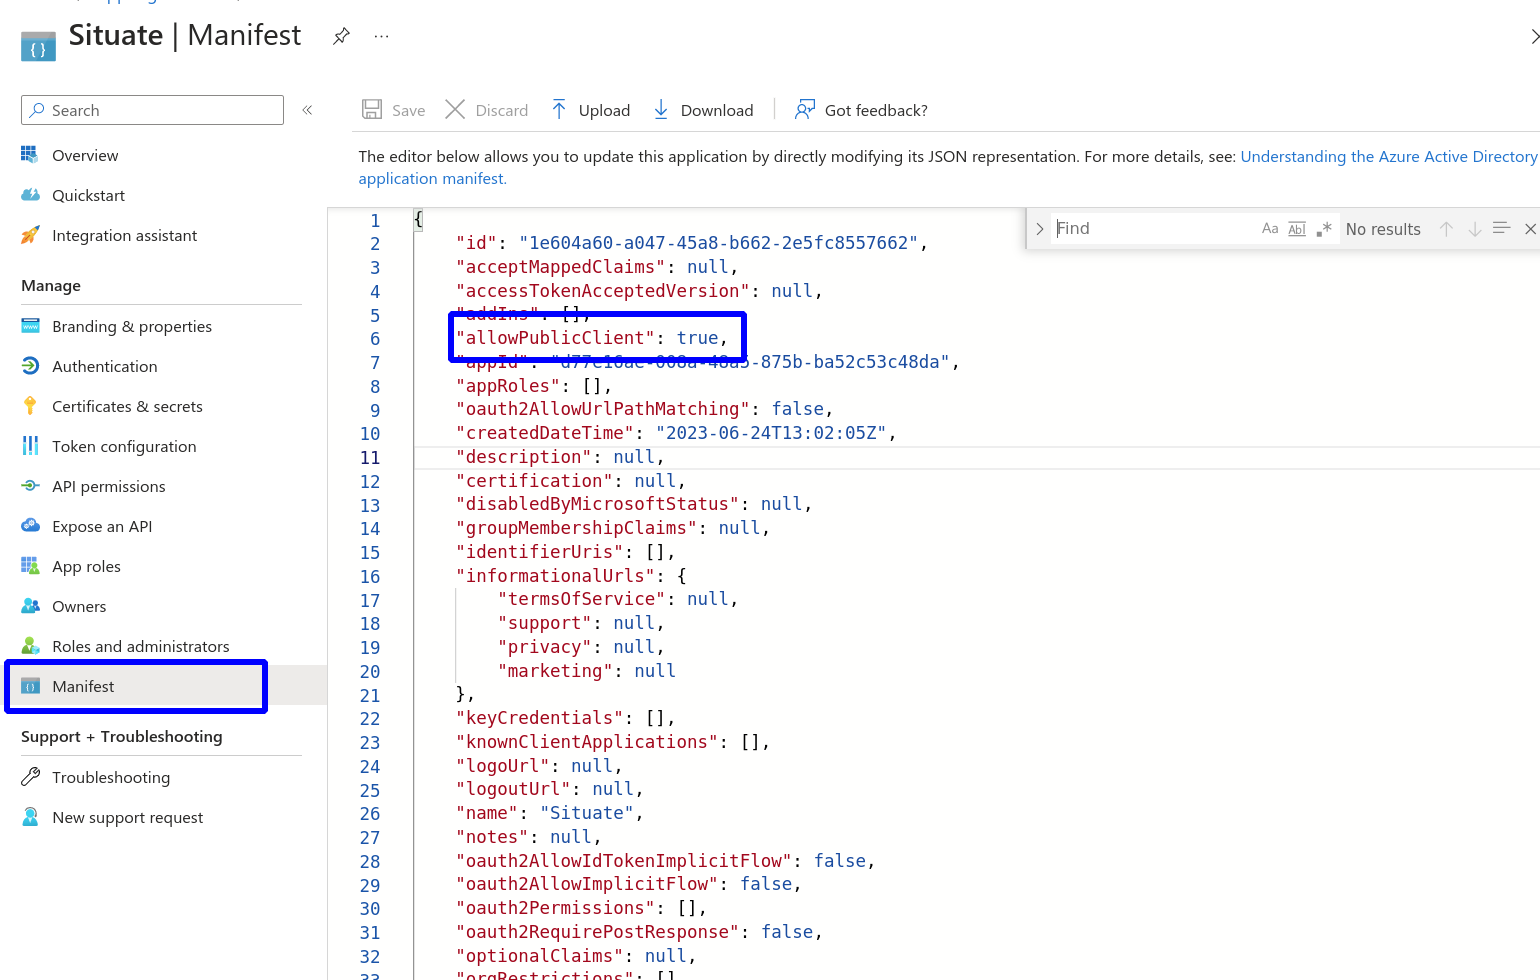
Select "Manifest" from the menu. Make sure the "allowPublicClient" setting is set to true. If it is not change it to true and then Save and Upload your changes.
Step 5: Register Service Principals in Exchange
Now that you have created and configured your app, exchange needs to be updated. You will need to open a Powershell window as Administrator and follow the steps below.
Install-Module -Name ExchangeOnlineManagement
Import-module ExchangeOnlineManagement
Connect-ExchangeOnline -Organization <tenantId>
Execute the above command changing <tenantId> with your Azure tenant ID.
New-ServicePrincipal -AppId <applicationId> -ServiceId <objectId>Run the command above supplying the Application ID and Object ID you saved in step 1. Note that "ServiceId" and "ObjectId" are the same.
Get-ServicePrincipal | flRun the command above to get the new principal it will be the "Identity" line in the output from the command. Most of the time, the Identity is the same as the Object Id, but not always.
Add-MailboxPermission -Identity "dave.xonasoftware.com" -User <sPRINCIPAL_ID> -AccessRights FullAccessFinally, run the command above replacing the email address and passing the correct identity. Once this step completes successfully, you can move on to configuring Situate.
Step 6: Setting Up Incoming Settings
In Situate go to "Endpoints" and create or edit your office 365 email endpoint.
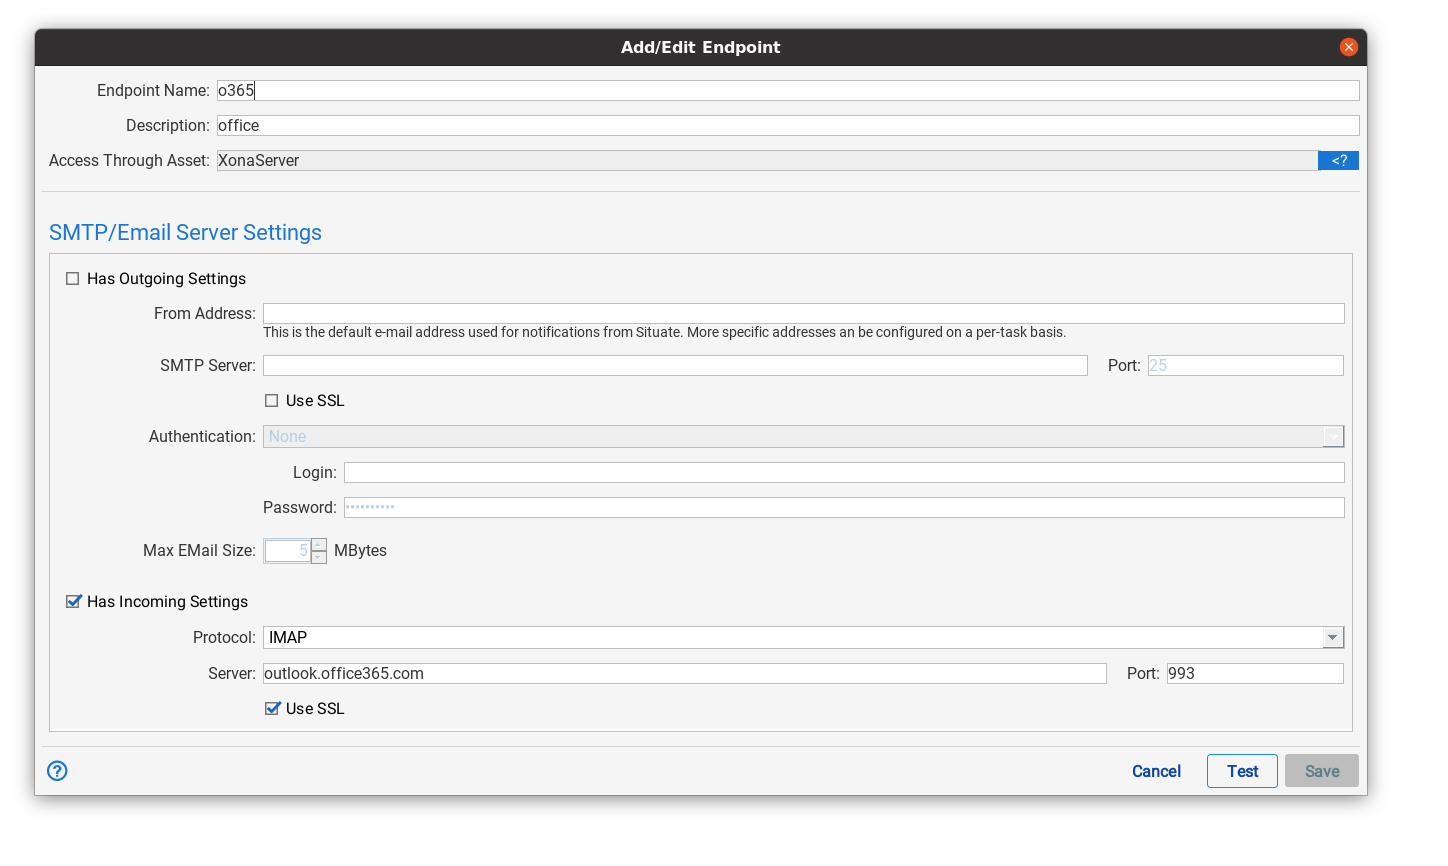
Make sure the "Has incomming settings" is selected, the protocol is IMAP", and outlook.office365.com is the server. "Use SSL" must also be selected.
Please note that the "Test" button cannot test XOAuth2 credentials
Step 7: Setup User Credential
When situate reads email, it does so on behalf of a particular user. Since the same endpoint may also act on behalf of multiple users, the security configuration for the incoming part of email is kept on a per-user basis.
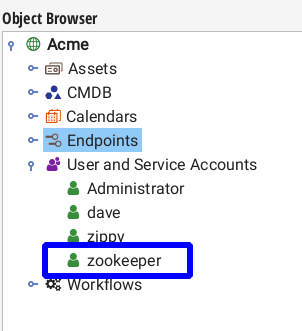
Go to the object browser, expand "User and Service Accounts", find the user the tail operation will run as, and select "Edit".

Next, we are going to create a new identity to talk to the email server. If you already have an existing on and are changing the credentials for XOAuth2, remove your old credential and create a new one using these steps. Go to the "Identities and Credentials" tab, and select the "+" button.
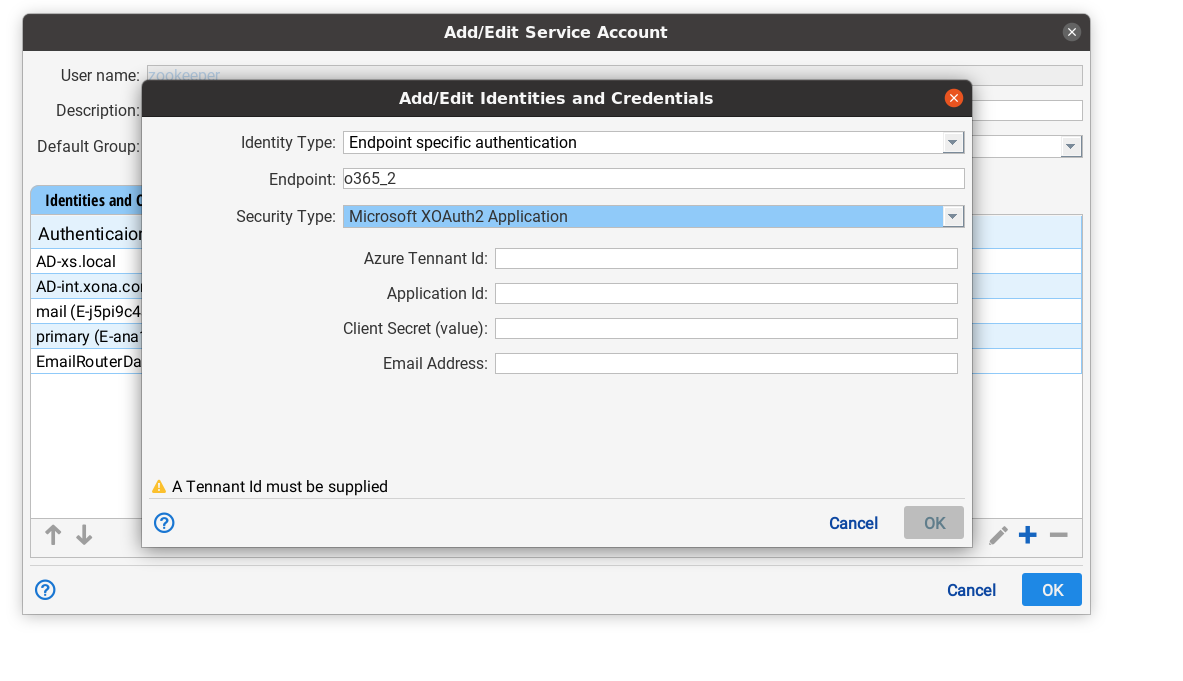
In this dialog, set "Identity type" to "Endpoint specific login". Then, in the "Endpoint" drop down, find and select your email endpoint. Set "Security type" to "Microsoft XOAuth2 Authentication". Enter your tenant ID, the Application ID (saved in step 1), the client secret (step 3), and the email address of the user. Select "OK" to save these setting and then "OK" to close the Add/Edit Service Account dialog.
The configuration is now complete and applications running as the service account you edited can use the email trigger to monitor incoming email.